Campaign Management System
Campaign Management System
The Campaign Management System is a powerful tool designed to streamline the process of creating, monitoring, and managing marketing campaigns for both WhatsApp and Facebook Ads within Odoo. This system provides a user-friendly interface to handle all aspects of campaign management, from defining target audiences to tracking performance metrics.
With this system, users can:
- Easily create and customize campaigns tailored to specific goals.
- Integrate and manage WhatsApp interactions and Facebook Ads in one unified platform.
- Monitor campaign progress through detailed dashboards and analytics.
- Optimize campaign performance by leveraging key insights and metrics.
This tutorial will guide you through the core functionalities of the Campaign Management System, including how to create a campaign, manage WhatsApp and Facebook Ads, and review campaign performance effectively. Whether you're a marketing professional or a business owner, this system simplifies the complexities of multi-platform campaign management, allowing you to focus on achieving impactful results.
1. Creating a New Campaign
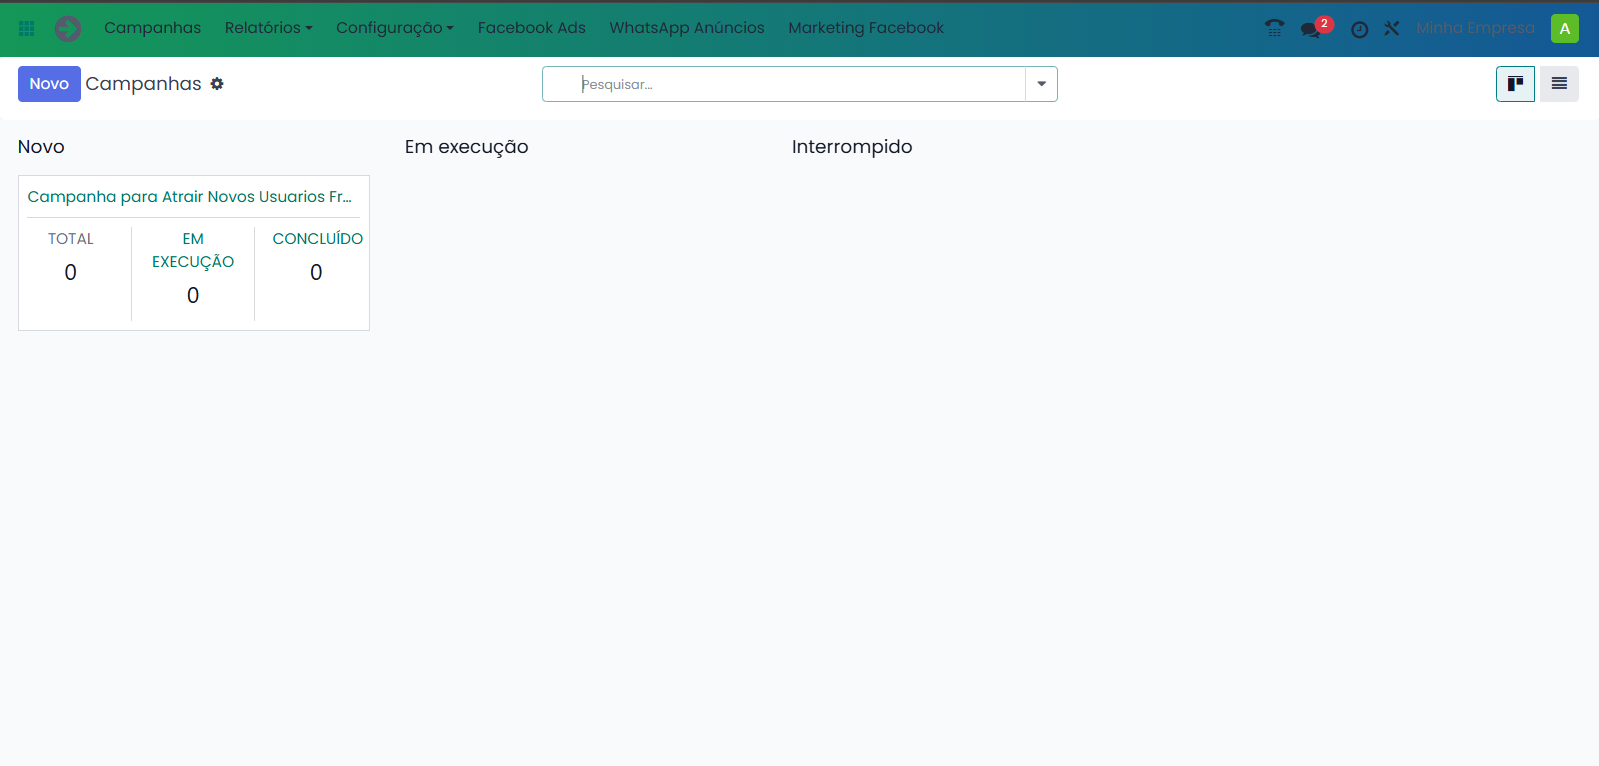
- Step 1: Go to the "Campaigns" menu on the top navigation bar and click on the "New" button.
- Step 2: A new campaign creation page will appear. Fill in the following fields:
- Responsible: Assign a responsible user for the campaign.
- Target: Specify the target audience (e.g., Contacts, Leads).
- Unit Based On: Select the unit type (e.g., Contact).
- Filter: Add conditions to filter your audience.
- Step 3: Use the "Add Condition" button to refine your target audience further.
- Step 4: Click on the "Save" button to register the campaign.
2. Managing WhatsApp Ads
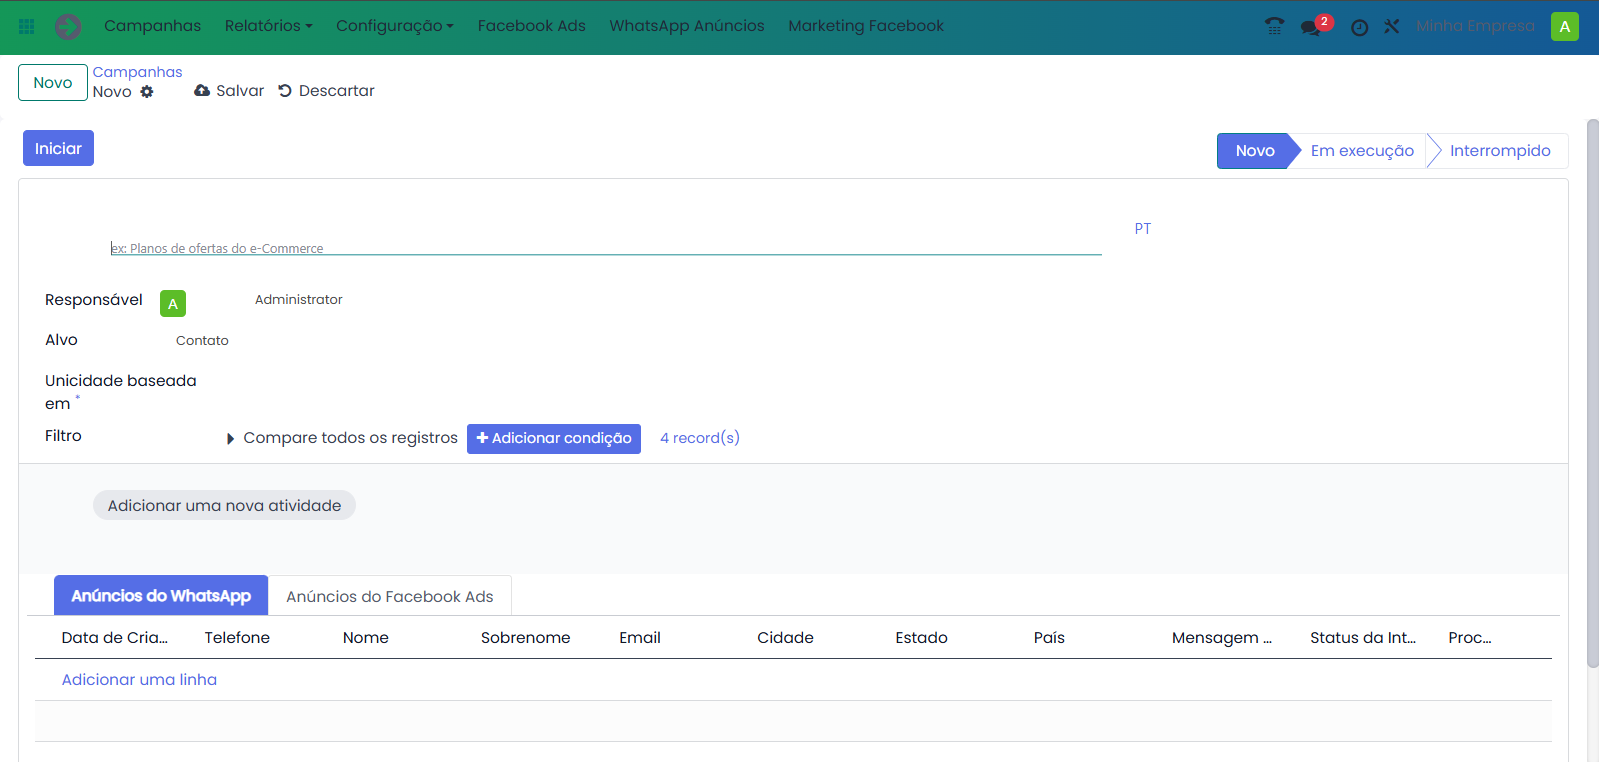
- Step 1: In the campaign form view, go to the "WhatsApp Ads" tab.
- Step 2: Add details for WhatsApp interactions:
- Date of Creation: Automatically generated.
- Phone Number, Name, Surname, and Email: Details of the contact interacting with the ad.
- Message and Status: Record the message and the current interaction status.
- Step 3: Use the "Add a Line" button to insert new WhatsApp ad details.
3. Managing Facebook Ads
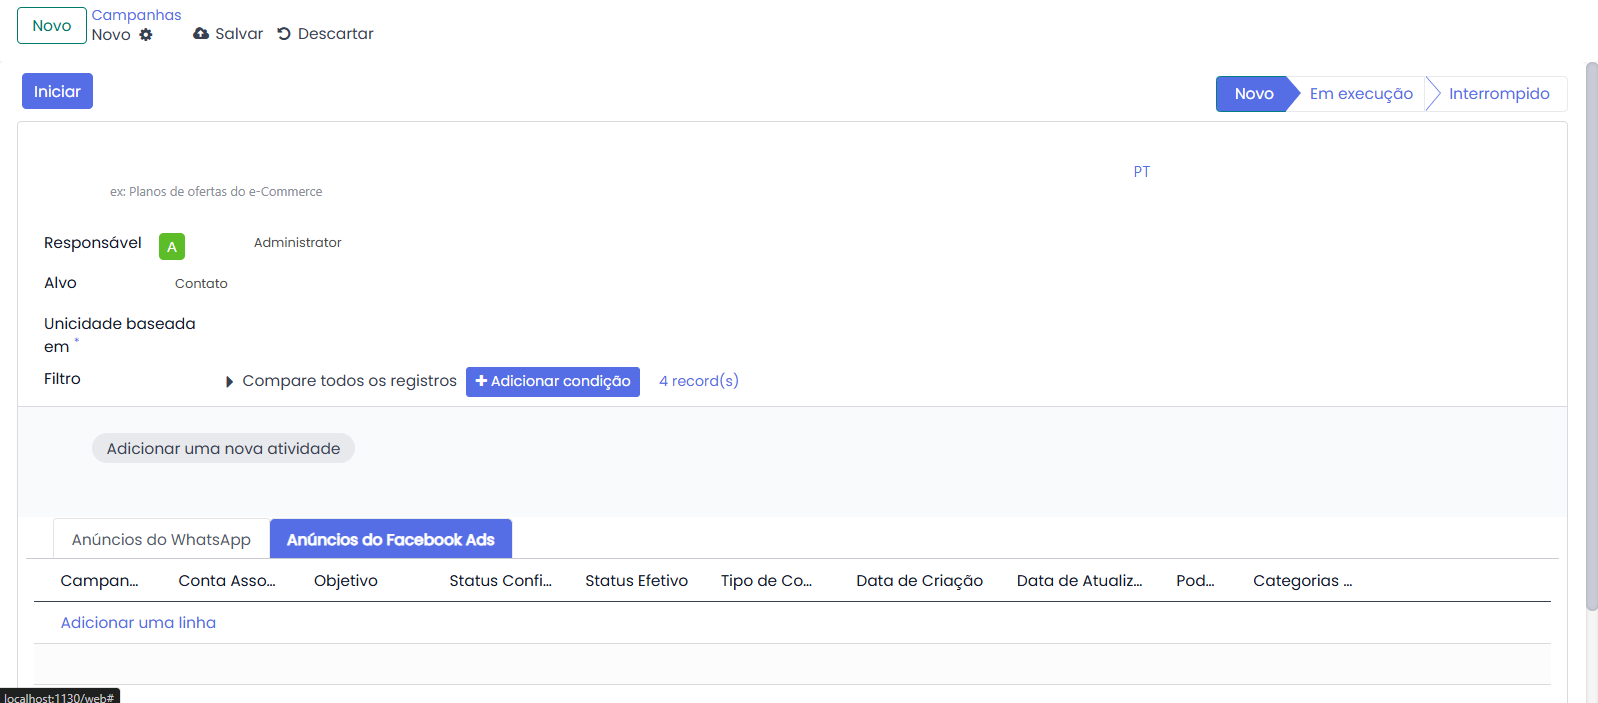
- Step 1: Switch to the "Facebook Ads" tab in the campaign form view.
- Step 2: Add details for Facebook campaigns, such as:
- Campaign Name
- Account Associated
- Objective
- Configured Status and Effective Status
- Creation and Update Dates
- Step 3: Use the "Add a Line" button to insert new Facebook ad campaign details.
4. Reviewing and Updating Campaign
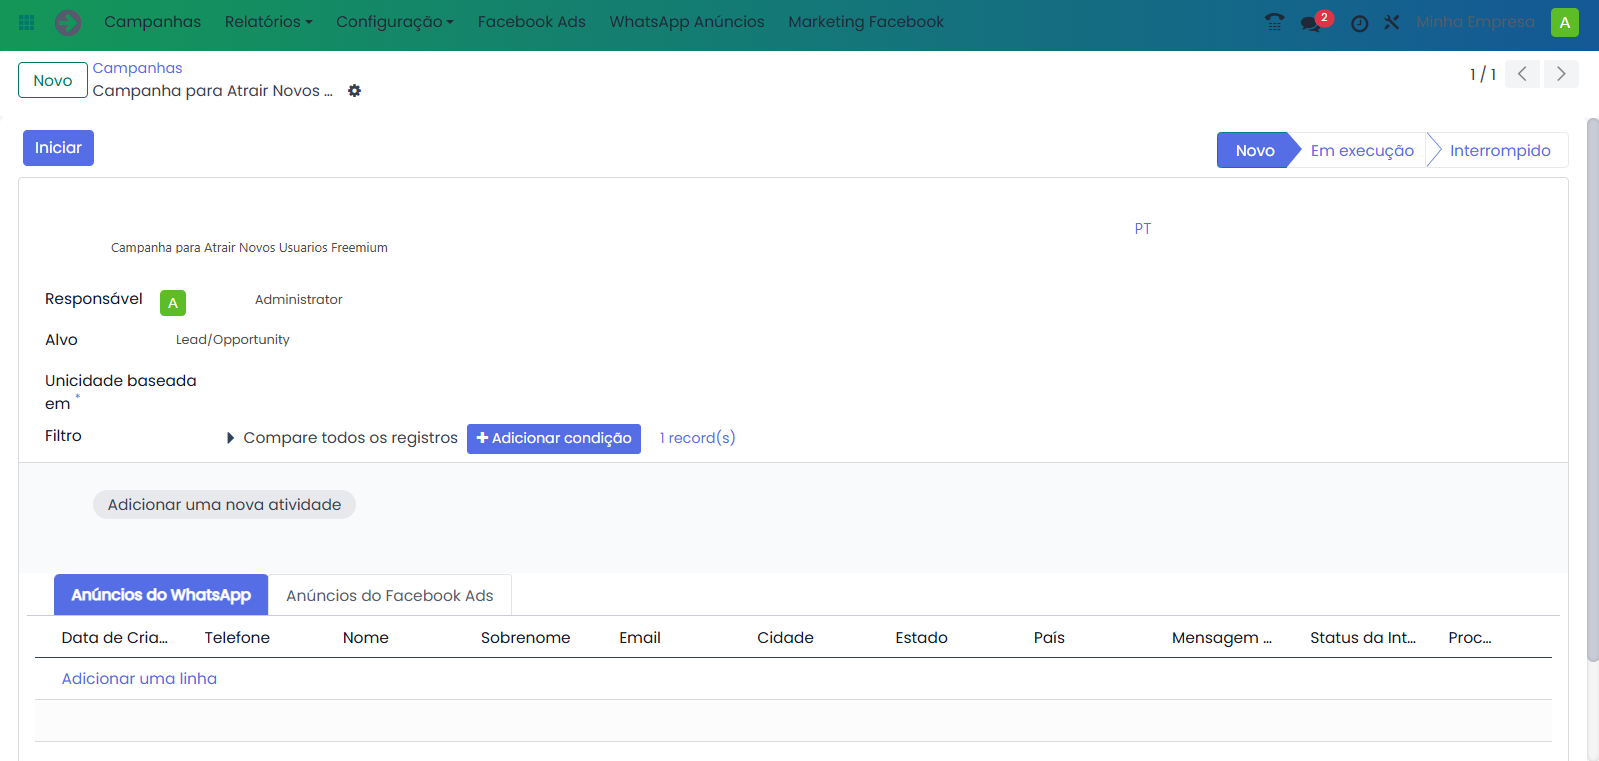
- Step 1: Once the campaign is created, it will be displayed in the campaigns dashboard.
- Step 2: You can review the campaign statuses (e.g., New, In Progress, Interrupted).
- Step 3: Open the campaign to make edits or update the ads.
Tips
- Use the Filters in the dashboard to quickly locate campaigns.
- Ensure that all required fields are filled to avoid errors during saving.
This concludes the tutorial for managing WhatsApp and Facebook Ads campaigns.
User Manual Update: Control for Facebook Campaigns
The campaign management system provides control over Facebook Ads campaigns. Users can perform only one action for managing campaigns: Activation and Deactivation. This ensures a streamlined process for campaign adjustments.
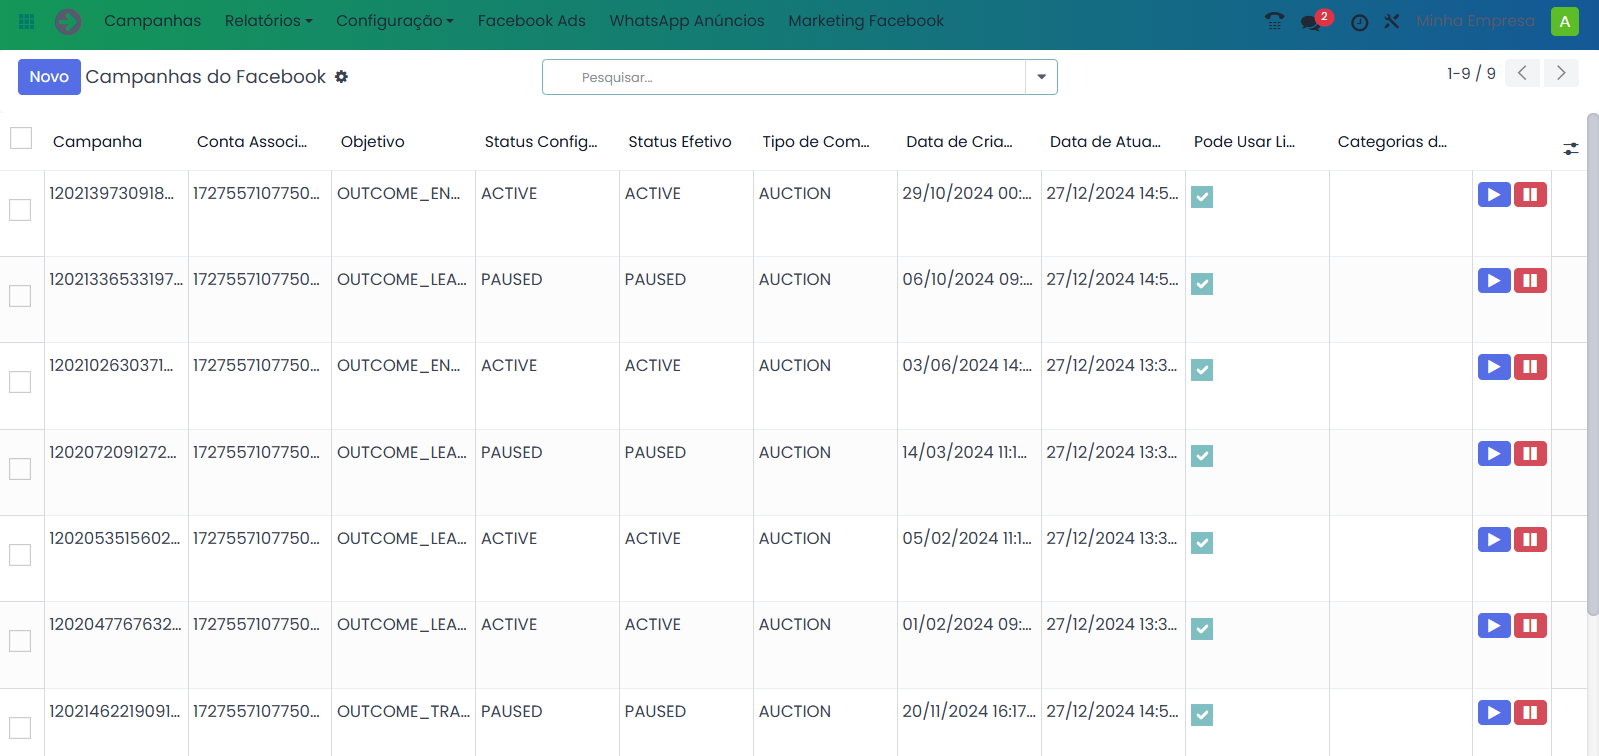
Step 1: Viewing Facebook Ads Campaigns
- Navigate to the Facebook Ads menu from the top navigation bar.
- The list view displays all fetched campaigns from the Facebook API, including:
- Campaign Name: Identifies the ad campaign.
- Associated Account: Links the campaign to its Facebook account.
- Objective: States the goal of the campaign (e.g., Lead Generation, Engagement).
- Configured and Effective Status: Shows the current and intended statuses of the campaign.
- Dates: Displays the creation and last updated timestamps.
Step 2: Controlling Campaign Status
The only available user actions are activating or pausing campaigns:
- Activating a Campaign:
- Click the blue play button next to a paused campaign.
- The system sends an API request to Facebook to activate the campaign.
- Once successful, the Configured Status and Effective Status will update to "ACTIVE."
- Pausing a Campaign:
- Click the red pause button next to an active campaign.
- The system sends an API request to Facebook to pause the campaign.
- The statuses will update to "PAUSED" upon success.
Step 3: Scheduled Synchronization
- Campaign data, including statuses and performance metrics, is fetched periodically through a scheduled action.
- Users do not need to manually refresh or update campaigns; the system synchronizes with the Facebook API automatically.
Important Notes:
- No Editing Capabilities: Users cannot modify campaign details such as objectives or budgets. These changes must be managed directly within the Facebook Ads Manager.
- Visibility Only: The system allows users to view campaign details and perform limited activation/deactivation actions.
- API Credentials: Ensure that valid API tokens and account settings are configured for seamless synchronization.
This controlled environment minimizes user error and focuses on high-level management of campaign activation statuses. For further questions or troubleshooting, contact your system administrator.